
 Recently I have found the wisdom to again use my linear offset attachment so I could get nice flats and better detail in the fine inkjet images. I have always known that offset printing is much gentler on plates, but using delicate surfaced waterless plates makes this even more important.
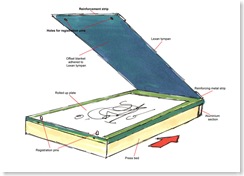
 A rubber blanket is glued to a Lexan tympan, which is hinged to a sheet of 1/4 inch aluminium by way of a
retractable system, making it removable to clean off
ink after finishing printing; easier than if the blanket is vertical. The aluminium support is attached to the press bed by means of pins in the side of the bed and removable pins from the top at the other end.
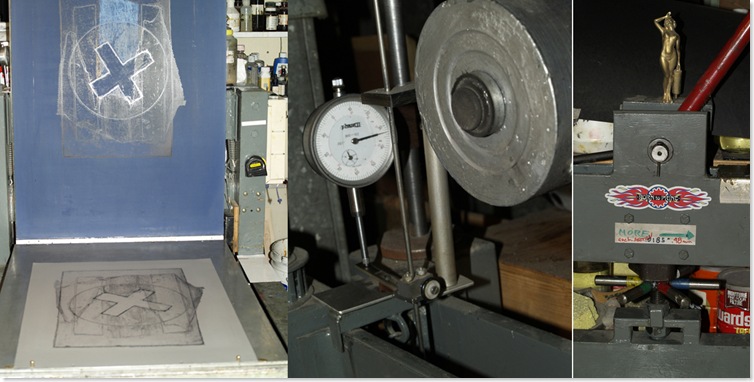
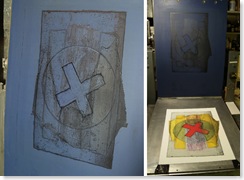
A rolled up plate is put on the bed and the blanket is brought down unto it. The blanket shows off the reflection of the ink, also the interference pigment that has offset from the print of a previous color. Offset doesn’t require much pressure; so I have added a dial gauge set up to measure just how much the scrapper bar in forced against the tympan. I use colored handles on the pressure system to make it easier to remember how much I moved the settings.
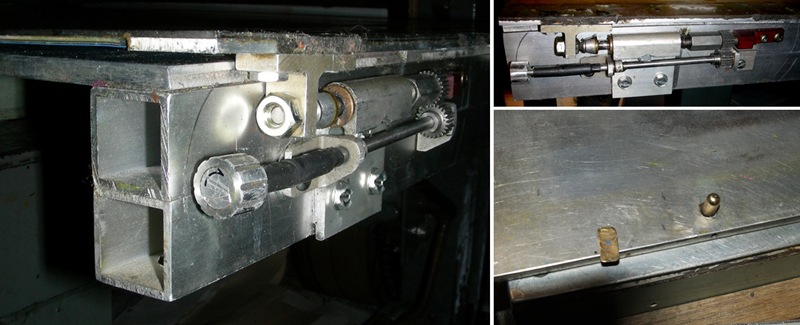
The support for the blanket consists of square aluminium that have been joined together to make a wider section needed to hold all the pieces. The sliding bolt set inside a sleeved channel has been lathed to produce a hollow to accept a cone that is secured to the tympan/blanket system. In turning the geared arrangement, the bolt puts force against two cones, giving me very a accurate hinge system for perfect registration. You can see the brass pin unto which the plate is set, and the flat brass top of the pin that holds the offset arrangement firmly to the press bed.
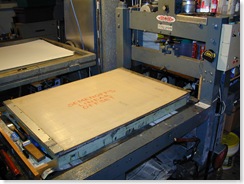
 You may have noticed that the plate is put on the bed at the bottom of the bed, unlike traditional press work, where it would be 180′ around. To make sure there is no shift of the plate at the end away from the pin holes, I have a scribed line on the bed, to which I add a short one on the plate when it is pushed hard up against the brass pins.
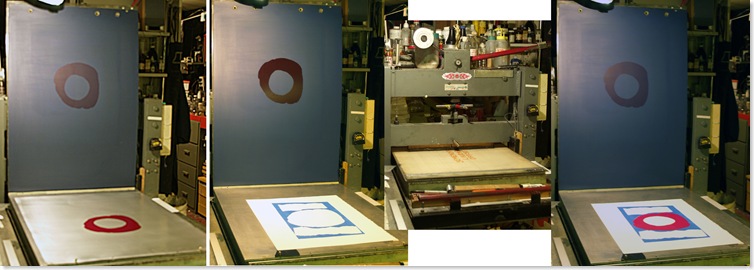
In this series of pictures I am showing the rolled up plate on the bed ready for the ink to be transferred to the blanket. The next pictures shows how much richer the blanket is with ink on it. The motorized press passed the bed under the scraper bar and the last image shows the ink now on the sheet.
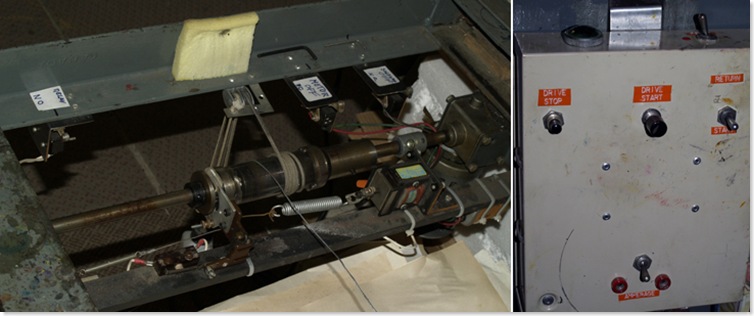
My press has two drive systems, one to move the bed under pressure and a smaller system that quickly returns the bed to rest. There are relays and electronic circuits within the control panel, which allow me to start either motor and also measure the amount of current the drive motor takes - if I need the information. My bed runs on rollers that hold the bed just off the drive roller by adjustable spring tension, which lets me put the bed into position before the scraper bar is pulled down. That allows the drive motor to pass the bed through without me having to engage or disengage any locks. The drive motor stops when a microswitch contacts a movable ramp, so I don’t have to monitor the press as I roll up a plate while the blanket is printing unto the paper. A cable pulls the bed back when I activate the return system. The white sponge is a shock absorber that dampens the bump at the end of the bed travel.
 This is another view of printing from the linear offset, showing how colors can be added to a print in perfect register. You can see the tabs I attach to the rag paper so that I don’t waste any of this expensive material. To have better registration, I use as wide apart pin holes as possible, but on this 15 inch wide sheet, I had to be right at the edges.
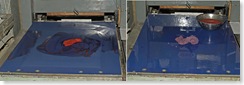 Cleaning the blanket is made easy by the fact it can be removed from the support so I can work on a level surface. After the rollers and slab are cleaned off, I attack the blanket with the water soluble solutions that dissolve the ink. A bit of clean water and a cloth leaves the blanket perfectly clean for the next edition.
I built this system many years ago and have used it for many editions, but lately I had got lazy about taking the time to clean the blanket, so begin using direct transfer. When I started to print on rough surfaced paper, I realized I had goofed because it was taking more time trying to not have salt and pepper in my flats. I built my press with automatic shut off where ever I placed my ramp, I could now make better use of the press while rolling up the plate for the next print.
I have also built a smaller motorized convertible press for both litho and etching. While building it, I also added a linear offset system to it as well. I had made it for my daughter who was into teaching printmaking in high school and might want to do it at her home. So far it sits in my studio, where I sometimes use it for intaglio research.