

Until intaglio photo plates were made available for intaglio printmakers, graduation of tints was done by variable width of lines with a burin or using mezzotint with scrapers and burnishes’. Because toner particles are opaque, they have become popular using one to the many photo plate that are available, but some etchers do not have light sources or vacuum frames, this method is more direct and can be mastered, using common store bought materials.
One of my very early research into using dry toner particles in intaglio, after I had perfected it’s use in traditional and waterless lithography. I only experimented in intaglio for the safety of the students, because many traditional printmaking chemicals were very toxic when used by a large group of young people not versed in chemistry.
Early toners were compounded from lampblack and anyone of thermos-plastics chosen by the manufacturers, but the toxic lampblack has been replaced with black iron oxide (Mars black} and wax is added to the plastic to lower the melting temperature to save energy. Because of these changes, one must do tests on the toner they can get for free from cartridge re-fillers
A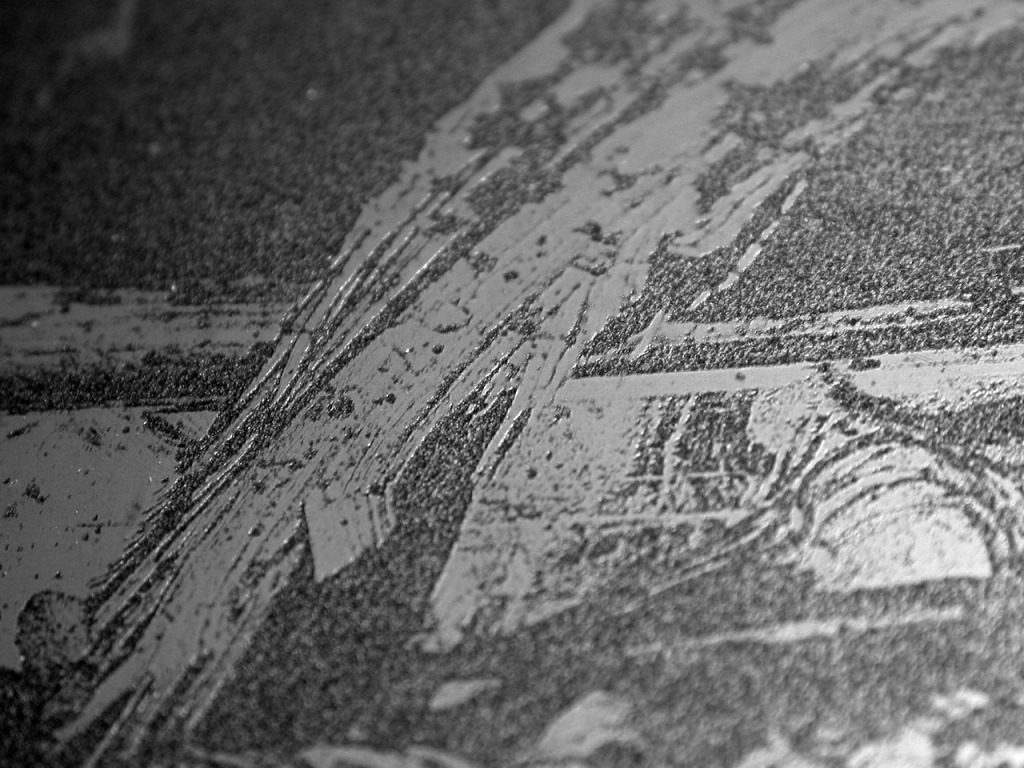 n uninked plate shows how aluminium corrodes with a texture that would have to be produced by mezzotinting, which takes another step in making an interesting image. Cupric chloride is much safer than acid and can be used on all commonly used metals for etching. The fact the bath can regenerate when access to oxygen from the air or chemical compounds are available, means it rarely has to be discarded.

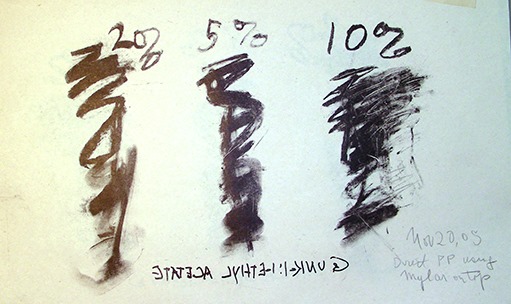
A surfactant must be used to wet the particles so that water washes of various kinds can be used in the image. Common dishwasher soap (Dawn) is used to produce suds and dishwasher rinse surfactant is used to avoid bubbles. Some manufacturers still use materials close to older toner and can be used with hydrocarbons to produce the reticulated washes. Test your toner because some may not work very well in this technique. It is easy to produce a larger toner paste that can be diluted for lighter tints that form patterns on how it is manipulated on the plate.

A small largemouth bottle is best to make your toner supply by first filling the bottle about ¼ with water, to which a simple surfactant like no suds dishwasher rinse is added. Toner is added to fill the bottle ¾ full, the top closed and the unit is shaken until all the toner is wet. Too much surfactant can actually coat the individual particles and prevent it bonding to the plate when heated.
 Toner is easily set with heat and use only enough to make sure the image can survive the application of diluted shellac that resists the mordant that produces a clean white. Some toners become impossible to washout with turpentine if overheated because of the plastics used. Test this issue before putting the effort. It is best to get your toner from a company that refills toner cartridges with only black ink. They first vacuum out the original toner and replace it with a suitable generic version.
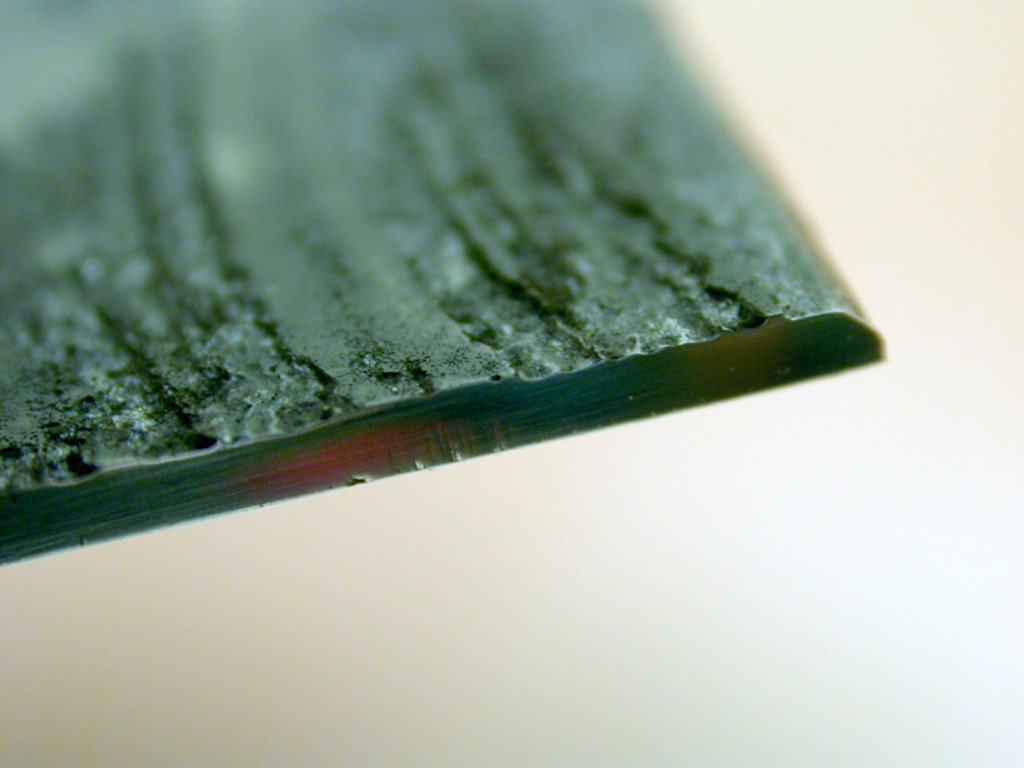
This plate was cut off at one side to show how well the copper sulfate mordant worked on aluminium. The etching can be deep enough to print the plate as a relief mode if that is required in some images.

After degreasing the metal plate, using a fine abrasive powder and water until the plate holds a thin film of water flushed over the surface; then dry with a clean cloth or paper towel. Using a large dinner plate, put some toner in it and add water to produce the type of image you require. A thicker mixture and a fan brush is used for a linear texture that can be worked over until you are satisfied with the image. A suitable brush and a few drops of Dawn can produce bubbles that create another type of reticulation. These images must be left to dry undisturbed until all water has evaporated. A paint stripping heat gun is adequate to fuse the toner to the plate by slowly going over the plate surface slowly and from side to side all the way to the bottom. Very large plates require a hot plate to be more efficient and more even bonding of the toner. Fused toner becomes darker and glossy that is allowed to cool. In a finished image; only to find it cannot be used for some reason.


Applying the acid resisting ground requires diluted shellac with a retarder to allow the surface to be evenly applied. First the orange shellac must be dissolve in wood alcohol. While commercial diluted shellac is available, it must be known to be fresh as it starts to deteriorate after dissolved. Sources for orange shellac flakes are available and will stay fresh until needed.
Because shellac is the excrement of the lac beetles that live on trees in Africa, it is picked by taking branches and leaves that are dissolved in alcohol to get the required material. It is then strained to remove bits of wood, leave and beetle parts and the solution left to dry in large flat trays to get the flakes sold for use in many processes. Cheaper sources may contain the unwanted pieces, so make sure your shellac is as clean as possible.

Add a retarder to prevent too fast drying and uneven coating on the plate. Many materials work, but the easiest to acquire is an acrylic retarder sold for painting to slow drying of the image and intermixing of colors. A dye is added to see progress of the toner removal and seeing how well the ground stand up to turpentine. While I used Eosin red dye; there are many in my studio that probably would have worked, even common cloth dyes from fabric stores. The dye must survive the high temperature reached (100 – 125 ‘C) to see the image after toner is removed. It is known that shellac heated to 150’C produces a tough film that is difficult to remove. Use of one of the new reflective thermometers that can be useful to get it right.
The shellac is diluted to equal one pound to a gallon of alcohol, which should produce a thick enough film to resist the mordant. One certainly would not mix such a large batch as little is needed except for teaching a very large class. This research plate shows how the length of time the plate was in the mordant, controls the depth of the etch. When the metal was rolled to a numbered gauge, it might have linear harder lines,
A simple shellac applicator can be made from a wide paper clamp and a narrow strip of a fuzzy blanket material I purchased years ago at a fabric store. The material is cut to the width of the clamp and about an inch wide. Place the material in the clamp with about half inch with the fold sticking out evenly. This is a simple brush that will only used for one session. Remove the material when this operation is done as it will bond to the clamp and be very difficult to remove when it dries.


Make a long narrow container from a side of a suitable plastic bottle to hold the ground to be dipped into. Place the plate on a sheet of scrap paper and use a loaded clamp to pull it across the plate to produce an even coat that is not too thick. Leave it to allow the alcohol to evaporate and then heat the plate until it reaches 100-125’C. After the plate cools, the toner is washed out with turpentine and a piece of cloth. If proportions used were right, the toner will start to dissolve but the colored shellac ground should not be affected. The surface of the plate is dried with a cloth and the back of the plate covered with vinyl shelving film that has a sticky back. The excess is trimmed and put into the mordant that was already prepared.
Safe cupric chloride mordant


I invented the use of copper sulfate for etching aluminium back in 1992, when a student could not afford the zinc plates I asked the students to buy when we started intaglio in February. After researching this safer mordant, Dr. Bader and I submitted an article to LEONARDO in 1994 and eventually published in 1998. More information on the technology can be found on my university website (http://homepage.usask.ca/~nis715/). In 2007 I discovered that a modified mordant would etch copper plates and had an article published in Printmaking Today, A British journal.


Until intaglio photo plates were made available for intaglio printmakers, graduation of tints was done by variable width of lines with a burin or using mezzotint with scrapers and burnishes’. Because toner particles are opaque, they have become popular using one to the many photo plates that are available, but some etchers do not have light sources or vacuum frames, this method is more direct and can be mastered, using common store bought materials.
Early toners were compounded from lampblack and anyone of thermos-plastics chosen by the manufacturers, but the toxic lampblack has been replaced with black iron oxide (Mars black} and wax is added to the plastic to lower the melting temperature to save energy. Because of these changes, one must do tests on the toner they can get for free from cartridge re-fillers.