

|
|
|
Press are expensive and out of the reach of most artists. Many talented printmakers can no longer practice their chosen method of expression after graduating as they have no access to a suitable printing press. While used presses come on the market from time to time, they are still too expensive for most printmakers, so they practice simpler method such as woodcuts and a spoon, or give up art all together. It does not have to be this way.
|
|
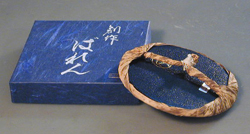
Rubbing the back of a sheet of paper pressed to an inked surface has been used for centuries, but the Japanese have carried the technique to great heights in their woodcut prints using a baren. It has been duplicated in plastic and assembly of metal balls, but the traditional bamboo baren cannot be beaten for delicacy in printing. Unfortunately this tool cannot produce enough pressure for any printing any media other than woodcuts. The Japanese technique of using thin waterleaf paper and waterbased ink, allows for a softer gentler application of pressure to give complete control of transfer of ink to paper. Wooden spoons and other items have been used by contemporary block printers to print their editions of small woodcuts |
|
Printing Lithographs and Monoprints This simple variation on a Japanese baren can be used to print waterless lithographs and monoprints without the need for a large mechanical unit. It will produce sufficient pressure to transfer ink unto smooth or soft papers. The unit was designed for my daughter who was teaching art at high school at the time and wanted to show students the easier waterless lithography process. Since expensive lithographic presses were not available in the local high school system, we figured a simple rolling method may produce enough pressure to obtain decent prints |
|
|
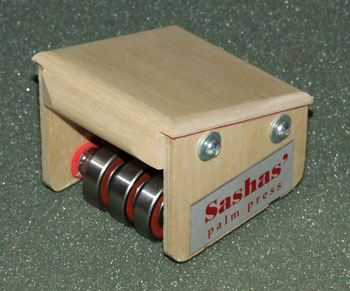
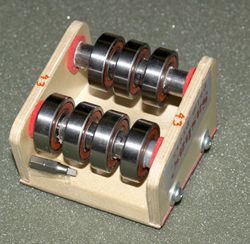
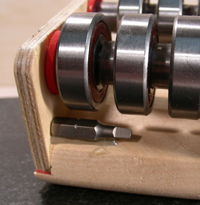
After trying a number of systems that I designed, the two banks of ball bearings arranged as overlapping wheels worked out to be the best approach. It allows the press to be easily turned to cover another part of the image since the wheels move as independent units. The units consist of a hard wood handle shaped for a comfortable grip and proper orientation of the wrist to it. The sides are made from five ply Baltic birch plywood for strength and stability. The seven ball bearings are assembled on two steel shafts of three and four sets so that their paths cover the area left by the opposing set. The angle of the handle is determined as best for the wrist to prevent damage from carpal tunnel syndrome. The level of the plate and paper should be low enough so that pressure can be applied directly from above to get the best print. |
|
The Physics Involved that Makes it All Work |
|
Considering the small area that each bearing bears on the surface, a surprising large amount can be produced from such a small unit. The physics of it are simple. The bearings are 1 cm wide and the contact they make is just less than 1 mm wide. This gives us 10 square mm per bearing. With seven bearings, we have 70 square mm pushing down on the paper. A square inch contains 645.67 square mm, so what ever pressure we can put on the palm press in multiplied by 9.224, which is the result of dividing the square inch area by 70. For heavy pressure I can press down between 85-90 pounds, which gives between 785 and 830 psi. I am not big and if I can get the plate low enough for me to put the weight of both hands, it is no problem to get into that range. When I push down to around 110 pounds - that raises the output to 1051 psi. Not as good as a proper litho press, but good enough for many prints. |
|
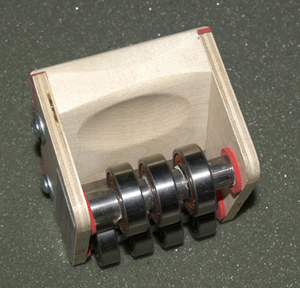
For difficult solid areas I suggest lifting the back and using just the 3 bearing at the front. With only 30 square mm being applied against the paper, one can multiply the hand pressure by 31 times. I do not expect anyone to print an edition while applying 110 pounds of pressure balancing the palm press up on 3 bearings, but for difficult flats it would help in small areas. With lighter pressure flats on smooth paper can be very good. You can lift one corner of the paper to see where there is weak transfer of ink and lay it back for more work. To put one bearing on a shaft is simple; to assemble a larger number is complicated and takes special equipment. To make one palm press takes 86 separate operations. Some are simple but others are very difficult and time consuming |

|
After assembly of a batch of units, they are tested for alignment of the two sets of bearings. I use a machinists' granite block that is accurate to .0001 of an inch over the entire surface. To make sure that all the bearings are perfectly aligned, I use the following method. I roll up a small plate with black ink and place a sheet of smooth laser paper on it. By rolling just partially across the back of the sheet once and removing it, I can see if all the rollers apply equal pressure. Depending on the spacing between the bearings, there may be a thin white line — or none at all. This is not important as the press is rolled over the sheet many times in all directions, obliterating any unprinted lines. If there is a twist in the unit, one end of the shaft will produce less pressure at anyone of the four corners. This can be adjusted out by loosening the screws and pressing down before tightening them again. |
|
Printing with the Palm Press
To make a "press", use a sheet of Mylar that is bigger than the plate and paper. Attach one end of the Mylar to a flat hard surface with wide masking tape and place the inked plate and paper on top of it - under the plastic. By restricting the other end of the Mylar to make sure there is no shifting, roll over the entire surface with fairly heavy pressure. One can test to see if ink transfer is even and complete by carefully lifting one end of the paper, while making sure the rest of it stays in contact with the inked plate. If more pressure is required, those areas can be given special attention. If even greater pressure is needed somewhere, tilt the unit so that either only the four or three rollers are making contact. This will increase the pressure over much lesser area. Flats are a printing problem even with traditional litho presses. Many lithographers use screen-printing for their flats to make sure there is no salt-and-pepper areas. The palm press is even less efficient for printing flats, but if a punched hole registration system is used, adding more ink is one solution to the problem. Smooth rag papers produce good results, as will some dampened varieties. If there is slight shifting of the paper from the roller action, I suggest punched hole registration for color work.
|

| Using registration pins, a piece of offset blanket and some ingenuity, one can make a simple system to print by offset so you don't have to mirror your drawing. |
|
Modifying ink Thick bulky ink is the answer for efficient printing with these units. I presume waterless lithography is the process being used, as it is the most practical in this case. Ink is modified according to my suggestions for using my waterless process, but it should be made a lot more viscous than used with a regular press. Epoxy hardener and magnesium carbonate are the best materials to use for thickening Van Son Rubberbase Plus ink. Cleanup with water by using my suggested cleaning solutions will keep the studio less toxic. |
|
Another print media for high schools The cost of lithographic and etching presses has prevented these media being taught in high schools. Only screen-printing and relief seem to be the one being used today. By using the less toxic waterless process and water cleanup of ink, lithography can now be presented as an alternative printmaking media. The recycling of aluminium plates according to my method reduces the cost of material within the budgets of most school systems |
|
|
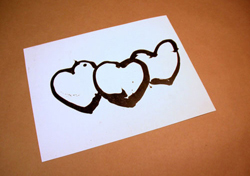
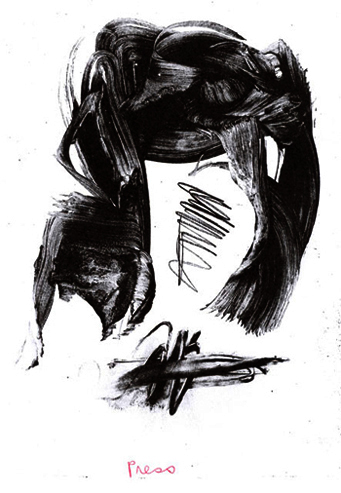
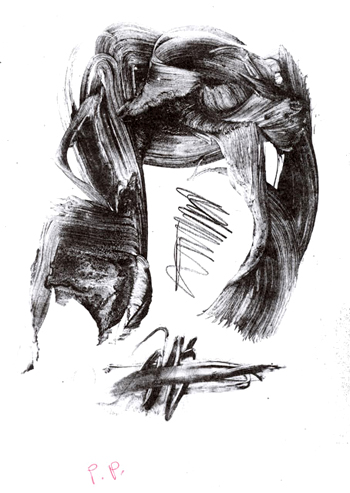
| Ink meant for palm press is thicker and when used with a regular litho press, the ink is spread out by the greater pressure to produce dot gain. | The plate was printed by a palm press using smooth paper. The image is closer to the drawing on the smooth recycled back of plates |
|
Many artists are using it for monoprints The word has been spread amongst monoprint artists that there is sufficient pressure from a palm press to print their work without need for a traditional press. As a result I have sold quite a large number of palm presses to this group of artists living in the Boston area. |
|
Because wood supports the rollers, it is susceptible to slight change of dimensions in shifting humidity. There could be warping, preventing all seven rollers making good contact with the paper. If this becomes a problem, loosen the four screws and press hard against an even surface while retightening them. The red foam plastic acts as a spring to press against the surface plane. When assemble, the units are adjusted on a machinist's granite surface plate to 0.0001 of an inch. A square headed screw adaptor is glued into the inside of the unit to loosen and tighten the screws. Keep water off the steel rollers to prevent rust. The rollers will take considerable amount of abuse as this application puts little strain on the ball bearings designed for heavier loads and high RPM. With care, it should last a lifetime |
| The palm press is not a replacement for a well built lithographic press, but can produce acceptable prints on any smooth paper and a hard surface underneath it - like a Formica table. I would not recommend a large edition multicolor print in a large format, as that is a major undertaking even for the professional printer with a press. It allows students who just graduated and would like to produce prints until they access to a press. I have known talented students who eventually gave up lithography and printmaking because lack of a press |
|
What People Say:
Hi Nik,
|
||
|
|
|
|
I am no longer making palm presses due to my age, but leave this page on my site as information for those who already purchased one. Since it is a very useful piece of equipment that can print etching very well as I have found out from other printmakers, it is a pity someone else has not taken on the manufacturing of these units.
Nik Semenoff e-mail contact: nik.semenoff@usask.ca |