
Early designs for litho presses as shown in De Capo Press reprint of Senefelder’s book
There have been questions on other forums asking for information on building ones’ own press - etching or litho. I have heard of printmakers designing and building their own press more directed to how they print - whether they printed privately or as collaborators. I have seen some very sophisticated litho presses doing the job just as well or maybe more effectively than from one of the major press manufacturers. One by a professional litho collaborator who made a very sophisticated press. Yes it can be done with a little help from your local machine shop and a bit of knowledge of metal work, welding and fabrication. Certainly at a fraction of commercial units.
Just like most printmakers, I did not have the funds for a commercial press - even at a second hand price. Being quite handy with tools and having a better workshop than most artists, I decided to build my own litho press in the mid 1980’s; but rethinking the use of a press to make one better.
 Back in the 50’s, I had acquired a dozen small 12 x 10 inch stones from an old printing shop who were eager to get rid of them at a giveaway price, so I built my first press using the frame of a small letterpress for the moving bed and a screw down frame from an old copying squeeze-down press that many linocut printers still use for editions. With some modifications, such as a scraper bar and pressure release system, I was able to master the diabolical craft of traditional lithography and produce small size prints. Back in the 50’s, I had acquired a dozen small 12 x 10 inch stones from an old printing shop who were eager to get rid of them at a giveaway price, so I built my first press using the frame of a small letterpress for the moving bed and a screw down frame from an old copying squeeze-down press that many linocut printers still use for editions. With some modifications, such as a scraper bar and pressure release system, I was able to master the diabolical craft of traditional lithography and produce small size prints.
 
A similar press was taken apart and modified to form the scraper bar system that allowed me to print stone lithos like the proof on the right.
 As my life moved on with different priorities of a family, I more or less gave up lithography except for small art projects with my children. In 1982, I was invited to use the facilities at the University of Saskatchewan as I now on faculty in the college of Extension as a media specialist, involved in producing printed material. The marvel of drawing on a large stone rekindled my interest in lithography as I started to print editions in the print department. As my life moved on with different priorities of a family, I more or less gave up lithography except for small art projects with my children. In 1982, I was invited to use the facilities at the University of Saskatchewan as I now on faculty in the college of Extension as a media specialist, involved in producing printed material. The marvel of drawing on a large stone rekindled my interest in lithography as I started to print editions in the print department.
I presume most printmaking departments are troubled with the same problem; careless students who seldom cleanup after printing their edition, leaving presses and area a disaster for anyone hoping to produce clean editions. Being given access to the facilities, I did not take advantage of being a faculty member, so allotted my time on the press to be the same as the students. But this became a problem as too much time was spent to clean the area if I wanted to end up with spotless prints. It was now time to think how I could produce a larger press to handle at least 22 x 30 inch sheets.
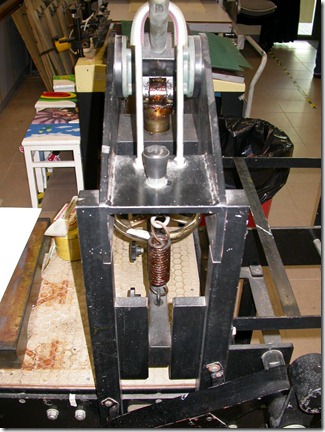
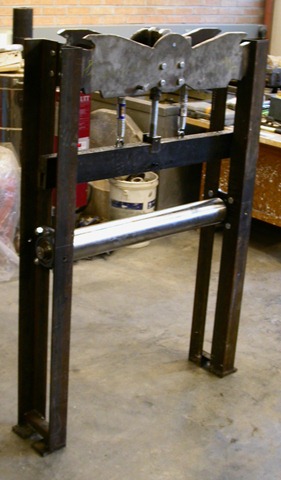
 Hand printing takes tremendous pressure to get ink transferred to paper, but that only concerns the middle section of the common press - the rest of the unit is to support the moving press bed. The total space a press takes up consists of the middle transfer section and the ends to hold up the press bed as it passes under pressure. This is from Jacobl Semko’s litho press, using a 4 inch diameter steel roller made for us by a friendly machine shop who was interested in helping the students . Hand printing takes tremendous pressure to get ink transferred to paper, but that only concerns the middle section of the common press - the rest of the unit is to support the moving press bed. The total space a press takes up consists of the middle transfer section and the ends to hold up the press bed as it passes under pressure. This is from Jacobl Semko’s litho press, using a 4 inch diameter steel roller made for us by a friendly machine shop who was interested in helping the students .
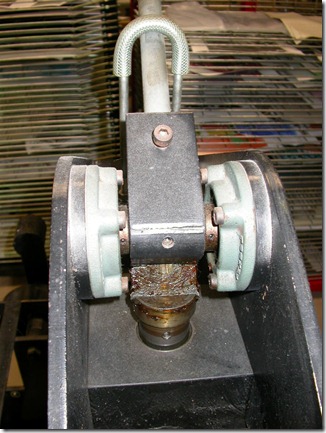
Common ball bearings were used in their presses, whereas I used bronze bushings supported in steel and resin casings.

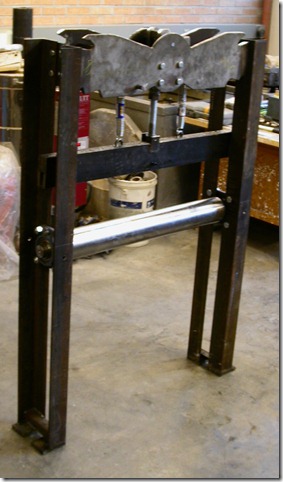
In litho presses, one side becomes more important as we print in one direction only - etchers can go both ways. So for a litho press, the working side is longer than the press bed, the section on the other side of the scraper bar can be considerably shorter; thus saving space in the studio. Unless one is printing on large stones, the weight of the press bed by itself can be carried by less robust metal work - even hardwood could do the job. This means one only has to be concerned with the main transfer system that contains rollers and an adjustable pressure system, plus a means to move the bed through without too much effort. In many ways an etching press is easier to construct as pressure is set by screws for the end bearings; the rest left to blankets. On my press, the total length is 74 inches with 42 for the retracted bed, 8 inches for the vertical main section and 24 to support the bed while printing. You will notice how I use the space to store stuff, producing a very cluttered studio.
To lessen the confusion of construction, I will first discuss on how I proceeded making my large litho press, adding features not available on commercial presses. I feel there are big advantages to the three concepts I have adapted and helped with those build by my students. These are:
 1/ Robust construction is needed only for the middle ink transfer section, the bed support can be weaker as long as alignment can be maintained. This means the press can be taken apart and moved easily by one or two persons, not requiring crews and large moving vehicles. Triangulation on the legs can be added if there is concern of the legs going out of line, but I have not found this a problem on my press in over 25 years of printing with the legs not even bolted down. 1/ Robust construction is needed only for the middle ink transfer section, the bed support can be weaker as long as alignment can be maintained. This means the press can be taken apart and moved easily by one or two persons, not requiring crews and large moving vehicles. Triangulation on the legs can be added if there is concern of the legs going out of line, but I have not found this a problem on my press in over 25 years of printing with the legs not even bolted down.
2/ A proportional pressure system better than the common cam - one that will give higher lift of the scraper bar in the up position - but provides ever increasing pressure as the lever comes to the end of its movement. This a method used in a small 3M stamping press which we used as a model.
 3/ An adjustable spring system that keeps the press bed just a millimeter off the drive roller, so there is no need to lift the bed or disengage the drive system from the roller. When the scraper bar is engaged, the bed is pressed down against the roller so printing can take place. To return the press bed, all one has to do is release the scraper bar so the bed lifts to move back easily on small wheels. 3/ An adjustable spring system that keeps the press bed just a millimeter off the drive roller, so there is no need to lift the bed or disengage the drive system from the roller. When the scraper bar is engaged, the bed is pressed down against the roller so printing can take place. To return the press bed, all one has to do is release the scraper bar so the bed lifts to move back easily on small wheels.
 There are other features one can add; such as motor drive with automatic stop, or a completely different smaller motorized method to pull back the bed into the start position. I have added both of these to my large press to make printing much easier at my age. There are other features one can add; such as motor drive with automatic stop, or a completely different smaller motorized method to pull back the bed into the start position. I have added both of these to my large press to make printing much easier at my age.


Because I didn’t realize that there was a progressive system being used in industry, my own press uses the standard caming method designed into the pressure lever. I have added lead weight to help keep the heavy handle up when at rest. Also, I have devised a way to measure the squeeze of my linear offset blanket on the sheet of paper. Commercial offset presses run around .004â€, but I don’t have to be that accurate. If too much squeeze (pressure) is applied, there will be “dot gainâ€, which will darken the image as rubber can spread.
 I suggested the progressive design to the two students who decided to make their own large litho presses, using my other two ideas as well. This is how Jacob Semko adapted the 3M stamping system to his press. He and Marshall Heaton build their litho presses using the sculpture studio as it had welding equipment and space, but some things were done in my workshop. Adapting the progressive principal caused them many problems to get it just right. I presume someone with greater machining skills would have not had as much trouble. I suggested the progressive design to the two students who decided to make their own large litho presses, using my other two ideas as well. This is how Jacob Semko adapted the 3M stamping system to his press. He and Marshall Heaton build their litho presses using the sculpture studio as it had welding equipment and space, but some things were done in my workshop. Adapting the progressive principal caused them many problems to get it just right. I presume someone with greater machining skills would have not had as much trouble.
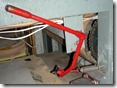
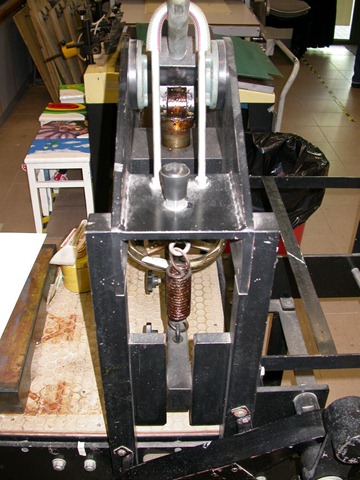
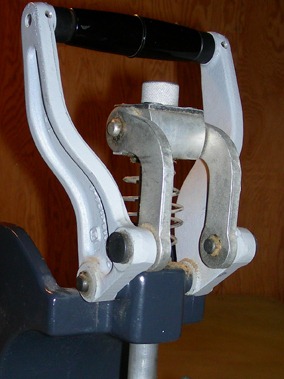
These are pictures of a press I encountered in Hong Kong that seemed to use some progressive system that made it easy to apply pressure. Hard to see from these pictures, but it was able to produce ample pressure.
 
View of the linear offset blanket which I use to get perfect flats with no salt and pepper, yet it is accurate enough to print fine tints. It can be removed and flipped over for easier cleaning than in a vertical position.
You might have noticed that the registration pins are now at the far end away from the scraper bar, near the end of the bed. This makes it much easier for me to place the paper; not having to lean over the bed to get to the opposite side. By using set of pivoting points, plus the registration pins that encounter the tympan/blanket, I can get very accurate registration if I am careful. For a third point of reference, I have a line engraved on my press bed, which I transfer a bit to the edge of my plate opposite the pins, giving me three points of registered on the plate.

Illustration of the system used to remove the tympan/blanket for easy cleaning. Coned bolts gives me accurate printing of editions.
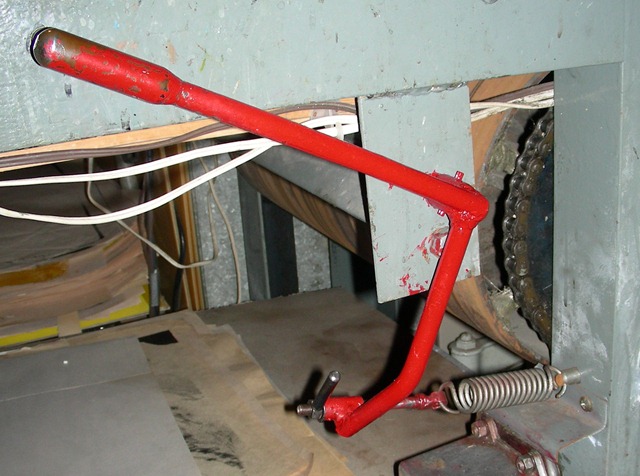
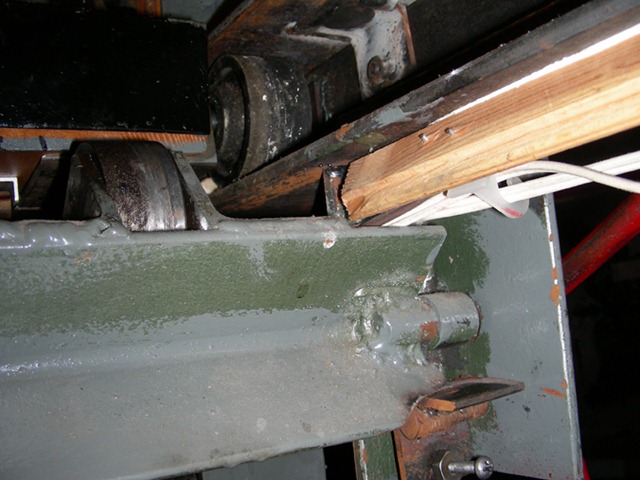
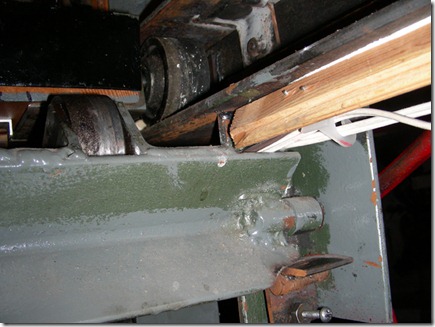 , The bed lift system shows the wheel on the bed when it was driven in as far as possible, revealing the steel wheel that will keep if off the drive rollers. The screw and locking nut at the bottom of the picture, is the adjustment for the amount of space between drive roller and metal strips on the bed. The red handle can be used to lift the bed, but the spring does it too. , The bed lift system shows the wheel on the bed when it was driven in as far as possible, revealing the steel wheel that will keep if off the drive rollers. The screw and locking nut at the bottom of the picture, is the adjustment for the amount of space between drive roller and metal strips on the bed. The red handle can be used to lift the bed, but the spring does it too.
I have two motor systems; a larger one to print the sheet and a smaller one to pull the bed back. Micro switches stop the movement of both so I don’t have to be at the press. This allows me to rollup the plate while the blanket is transferring the image unto the paper.
I have many pictures of the small convertible press and the large etching press I worked on with Jacob. I will gladly put them on the blog if enough are interested to see how others have built presses. Send me an e-mail if you want more information.
|


Spanish subjunctive conjugation practice
Building your Own Press | New Directions in Printmaking
swarovski crystals
Building your Own Press | New Directions in Printmaking
backrezepte aus deutschland
Building your Own Press | New Directions in Printmaking
read review
Building your Own Press | New Directions in Printmaking